Be inspired!

As we find our way through the blogging explosion maybe I can help you start your new passion - making candles and making soaps too. It's easy.

very easy....

very easy....

Monday, February 6, 2012

20 more tips...


Here are some more tips.
Your questions help us identify areas that will interest other readers, so keep asking!


The photo shows a batch of glass candles being made, always make some tea lights at the same time.
  1. warm glass containers before pouring candles
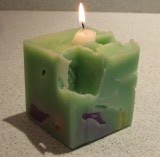
  2. create channels when making pillars
  3. use palm wax, as is, for a fast effective designer candle in any glass or ceramic container - pour in the beads and add a waxed wick
  4. roll a beeswax candle for a perfect fit to your candle holder
  5. use a long needle to help with wicking tricky moulds - available at quilting shops
  6. when making container candles, pour the wax, wait for a minute till an outer layer forms, then sit the wick into the 'muddy' wax on the bottom - it will stand there happy as...
  7. it's hard to tell the colour of your wax when it's hot - take out a little with a teaspoon, put it into cold water and watch it change to the finished colour when cold. You can then alter the colour to make it exactly as you need it, keep testing till you're there.
  8. if you want a textured look, 'rustic', pour your wax at a lower temperature
  9. 10ml fragrance is generally recommended to go into 1kg wax. For container candles you can increase this amount, but it's a good start point.
  10. cracks in container soy? You need to change to C-Soy from www.candlemaking.com.au; it could be over-fragranced; poured too hot; poured too fast
  11. soy wax looks curdled? too much fragrance
  12. want a better scent throw? choose a fragrance with an inherently stronger scent; burn your candle a while then extinguish the flame and enjoy the scent from the melt pool
  13. boldest colours are achievable in paraffin, the most translucent of the wax
  14. pour palm into warm glass for a great patterned container candle
  15. beeswax won't burn - see earlier blog, it may need more washing and filtering
  16. TEST the burn time and quality before you sell your candle
  17. if your wax burn too quickly, reduce the size of the wick
  18. if the candle 'tunnels' it needs a larger wick, larger flame, more heat, larger melt pool
  19. watch a video before starting, it will help a great deal
  20. ask your supplier for help, there is always an easy solution! Our customers know we are there to help on 02 9653 3600

Tuesday, January 31, 2012

Candle Makers' secrets - 20 top tips!


Daily emails ask simple questions that will seem obvious once you get started. I thought it would be a good to idea to keep sharing some of the basic FAQ's here and direct you to some of the information pages that may assist you.


There are also great Free and Short videos on our site, like seeing a mini class.
I do hope all these tips help you make candle making a fun and satisfying craft!
  1. wick size is about the diameter of the candle and the melt pool it creates, all depends on the flame size
  2. in moulds, use cotton wick secured at each end
  3. in containers use pre-waxed wick and tab assemblies with a base to hold it in place
  4. pillar wax must be strong and firm, and contract from the mould - no lubricant is required for a good wax
  5. beeswax will struggle to burn well if it has honey or debris still in it - wash and filter well ( see earlier blog post)
  6. C-soy wax is our choice for containers - it has a low melt point and adheres well to the sides of the glass for a better look
  7. use a thermometer to drop the C-soy wax to a pour temp of 60C or less for best look
  8. don't over fragrance - it will impact the stability of the wax and the burn may be smokey and too fast. Be aware that cheap fragrances will require more...(not so cheap!)..we suggest 10-20ml only
  9. all waxes should be melted in a double saucepan - water has a max. temperature of 100C so you will never have a fire from overheated wax
  10. always pour with your glass or moulds in a tray (large baking dish, kitty litter tray etc)
  11. a shiny candle has been poured 'hot' - 80C or over
  12. icicles and feather palm wax show their patterns best when poured over 90C
  13. textured candles are poured cold - they begin to set as they hit the mould
  14. when choosing a pour temperature consider the mould and its heat restrictions
  15. use continuous wicking where possible to save heaps of time (see blog)
  16. beeswax can be used successfully in silicon, most 2 part moulds, pyramids and wider columns
  17. icicle and feather palm are gorgeous in our metal columns and silicon moulds as they can tolerate higher pour temperatures
  18. always poke at the bottom of the candle as it cools to form channels into the contraction cavity - see info sheet about making palm candles that is relevant to any pillar candle
  19. when making tea lights part fill them, stand the wick, then fill at leisure
  20. experiment with your waxes, we love to mix soy with beeswax, container maker with beeswax

Friday, June 17, 2011

Mix it up and get creative!


Following our test with the versatile Uni-Soy wax, we went a step further to use the container maker in other waxes. Why not?
The candles in the photo have been made by mixing it up...see more.

Beeswax is a favourite of mine but it's a tough one to burn in containers as it just won't melt right across.
So we started with 20% container maker and have now gone to a rate of 1:1 trial (for every 100gm beeswax add 100ml container maker) and the burn as a container candle is just lovely!
It tolerates the extra oil load beautifully and still feels and smells like beeswax. Its characteristics are not lost at all, though its colour is reduced (by half presumably).
This also reduces the cost of your beeswax candle...

Aura Palm - an earlier blog claims its place as economical, versatile and a mimicks soy and paraffin in pillars. So we tested it with 20% container maker and it also became a perfect container candle.

Then we tried Uni-Soy (1/3) with beeswax (1/3) and container maker (1/3) which made a beautiful softly coloured candle.

Conversely, as mentioned in the previous blog, you can blend your waxes to make an ideal pillar. Uni-Soy and beeswax; uni-soy and aura etc.


It's empowering to know that you can create the candle you want!
So add container maker to your shopping list and see what you can do!!

Uni-Soy, the most versatile soy wax ever!

We've imported the best soy ever. Pure soy wax with a melt temperature of 60 it can be manipulated to your needs.
Basically a container candle is expected to:
  1. melt right across, with no crater effect
  2. adhere to the walls of the containers, a purely visual expectation
In containers you can also load your fragrance a little heavier, as melting is no issue.
  • Melt Uni-Soy and add 'container maker' at the rate of 200-300ml per kg once melted. Then add your colour and fragrance choices.
  • Tip: allow the wax mixture to cool to 60-65 and pour into warmed glass.
For a perfect pillar melt Uni-Soy with 20% of a harder wax.
We have tested it with wax improver, aura palm wax and beeswax. The addition of paraffin would also be acceptable.
Tests have shown a 6 hour burn with a rim of 5mm which is
extra-ordinary.

This wax has taught us to be brave and try new mixes, do not be limited by a wax or blend.
See the next blog for lots of other great ideas!

Friday, April 15, 2011

Beeswax revealed


My previous blogs show that I love beeswax! and of course beeswax candles.
But have you ever had a batch that just won't burn? (flame in rear of photo)
You'ld never buy a batch like that from us, but if a friend hands you some it just could be a 'no-burn' wax, read on...


We recommend you test a batch before before you start making your candles.
Dig a hole with a skewer and pop in a piece of wick:
  • does it burn with a strong flame? (flame in front)
  • does it burn for hours?
If not, and the flame is struggling then you need to FIX the wax.
  • use the double saucepan method to safely melt the wax
  • add water into the wax pot, about 1/3
  • melt the wax at a high simmer
  • stir the water through the melted wax - this will dissolve any honey and nectar still in the wax - you will be surprised how coloured the water will be with dissolved 'pollutants'
  • you could even repeat this with a second wash - take the top wax off and filter it into the second pot through a cloth and stocking filter
  • take the wax off the top and filter it into your final moulding / container.


The filtering needs to be fine. In the second photo you can see the fine material that has moved into the wick and choked it. No wax can move up the wick to the flame.

We were shocked the first time we tested wax that did not burn. A few customers had told me of their plight with wax directly from the hive. We were quite astonished to stumble on a batch ourselves. It looked clean and absolutely gorgeous with a strong gold colour that is so admired by candle makers. There was no indication of the fine black particles held in suspension or the presence of the honey and pollen.

To buy best beeswax, shop on our site or give us a call on 02 9653 3600.
Hope that helps you,
from www.candlemaking.com.au

Friday, March 18, 2011

Can you tell which is which?


Yes, it's a bit tricky isn't it? Even if there were prices on these you might be hard pressed telling them apart at a glance.
These candles were all amde to make a glossy, white, perfect candle with good burn qualities.

People choose their wax for many reasons, the look, the feel, environmental issues, and the cost.
So when I'm asked what's best I can only add all those factors together - most economical, reliable, clean finish and white in its base form - Aura palm Wax for a perfectly natural candle.

Can you tell which is which?
...far left is Aura Palm, in the centre is Paraffin, right is Soy Wax for pillars.
Also coincidentally they are ordered from cheapest @ $7.50 to most @ $11.50.
Bulk pricing offers better deals on the per kg price.

You will find the waxes at http://www.candlemaking.com.au/Candle-Making

Thursday, March 17, 2011

Palm wax IS all it's cracked up to be!


Palm wax makes the most rewarding natural candles - they look spectacular and burn really well.
Each wax has its idiosyncrasies in the making. Palm wax is no different, so a few hints are below to help.


There is high chance that the palm wax will track through the wick and out past your seal - be sure to cover the wick completely with sealer (blue tack).


Melt your wax over a double boiler - see our previous blog
If you are after a crystal pattern from your palm wax, raise the water to boil, so the wax increases to about 95°C. Metal moulds work best as they heat quickly and allow the wax to form crystals at its own pace.


The shell forms quickly and becomes quite rigid appearing to have no contraction - break the surface regularly as the candle cools so there is a channel into the insides for topping up later.


The pour temperature is dependent on the moulds: metal can be poured high, as can silicon, but be mindful of manufacturer's recommendations on PVC etc.

Once the candle is cold, it can be topped up like any other candle, the base finished and the wick waxed.


Palm candles are an absolute wonder when they are removed from the mould - each shape impacts the lay of the crystals, so go experiment!
All Australian Candle Making Supplies and Kits has all the right products for making these beautiful candles.
For more details see the site for free on-line videos and 'how to' pages.